The headliner is a pain in the butt. Removing is pretty easy but geting the screw back in the eyeglass holder thing stinks. Remove the rear filler panel(just pulls), remove the done lights, remove the grab handle, remove the visors, and remove the eyeglass holder by pulling down, then remove the eyglass holder bracket. The pillar covers can come out, but I just pulled the headliner out with them still on (you will see why). When the headliner is loose, fold it longwise and then pull it out the back.
Measure the length of the board that you will need. Remember that you will be flattening a lip on the middle brace. Remove the middle roof brace, use a marker to outline it so that it goes back to where it was, (ALSO PARK ON A LEVEL AREA). Cut a couple of slots where the board will be and bend the lip flat. I put a screw in there to hold the board to make it easier for assembly.
Now test mount the board. Put the headliner back in loosely (enough to keep it up using the pillar covers to hold it. Measuring everything from the center, find the place where the monitor will be. Then drill holes where it will be CAREFULLY enough to just start scoring the panel. Remove the headliner again. Then drill the scored holes all the way through and a 1" hole for the monitor wire to go through. Pull the mounting board down and put the mounting screws from the back of the board (with washers)so that they wil hang down. Now what you can do is take a thin metal strap or wood strip and cover the heads of the mounting screws that hold the monitor to keep them from pushing back up. The headliner should already have the holes where it was drilled for the mounting screws during the test mount. What you can do is take a soldering iron, hot bolt and ream out the hole. This will also seal the edges so it wont fray later. DO NOT USE OPEN FLAME!!, this will probably melt the whole liner.
Now mount the board for the last time. I used super construction adhesive on the rear brace. Mount the center roof brace with the board.
Reinstall the headliner leaving the passenger side loose so that you can run the wires. Then the fun part, buttoning it all up.
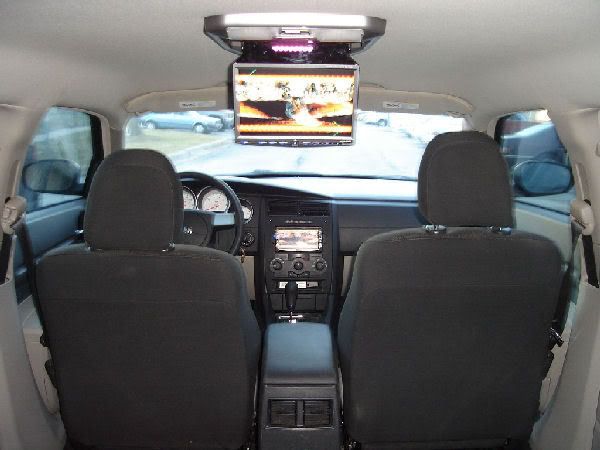
Here are a few pics I took during my install. I thought I would be slick and just screw the monitor into the board from the bottom up. I mis-measured and/or forgot about the headliner squeezing up from the pressure of mounting the monitor and peaked 2 screws into the roof.
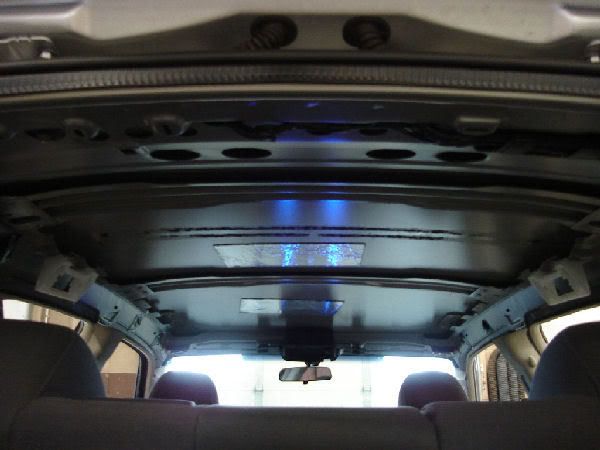
Roof with middle roof brace off, you can see the remenants of the foam
![Image]()
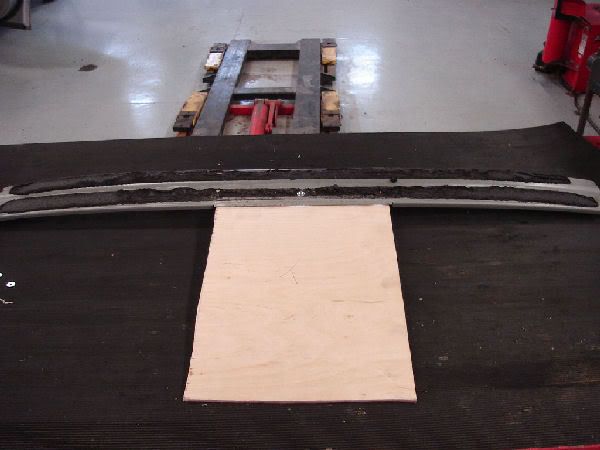
The middle roof brace with the lip flattened and a screw to hold the board
![Image]()
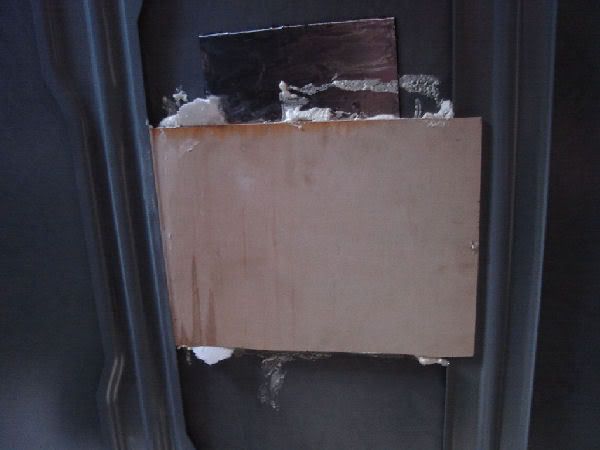
Finally it all mounted, construction adhesive on rear brace and board joint
![Image]()
If anyone has any ? feel free to message me or better yet ask it here, so that someone else may have the same ?. This is on the middle range of difficulty, take about a day to do it right. My local shop said they would install for $200, its up to you if it would be worth it or not. I dont think that I would want to do it again. Main reason I have been putting off my dark headliner is that I would have to do it all again.
![Image]()
Measure the length of the board that you will need. Remember that you will be flattening a lip on the middle brace. Remove the middle roof brace, use a marker to outline it so that it goes back to where it was, (ALSO PARK ON A LEVEL AREA). Cut a couple of slots where the board will be and bend the lip flat. I put a screw in there to hold the board to make it easier for assembly.
Now test mount the board. Put the headliner back in loosely (enough to keep it up using the pillar covers to hold it. Measuring everything from the center, find the place where the monitor will be. Then drill holes where it will be CAREFULLY enough to just start scoring the panel. Remove the headliner again. Then drill the scored holes all the way through and a 1" hole for the monitor wire to go through. Pull the mounting board down and put the mounting screws from the back of the board (with washers)so that they wil hang down. Now what you can do is take a thin metal strap or wood strip and cover the heads of the mounting screws that hold the monitor to keep them from pushing back up. The headliner should already have the holes where it was drilled for the mounting screws during the test mount. What you can do is take a soldering iron, hot bolt and ream out the hole. This will also seal the edges so it wont fray later. DO NOT USE OPEN FLAME!!, this will probably melt the whole liner.
Now mount the board for the last time. I used super construction adhesive on the rear brace. Mount the center roof brace with the board.
Reinstall the headliner leaving the passenger side loose so that you can run the wires. Then the fun part, buttoning it all up.
Here are a few pics I took during my install. I thought I would be slick and just screw the monitor into the board from the bottom up. I mis-measured and/or forgot about the headliner squeezing up from the pressure of mounting the monitor and peaked 2 screws into the roof.
Roof with middle roof brace off, you can see the remenants of the foam
The middle roof brace with the lip flattened and a screw to hold the board
Finally it all mounted, construction adhesive on rear brace and board joint
If anyone has any ? feel free to message me or better yet ask it here, so that someone else may have the same ?. This is on the middle range of difficulty, take about a day to do it right. My local shop said they would install for $200, its up to you if it would be worth it or not. I dont think that I would want to do it again. Main reason I have been putting off my dark headliner is that I would have to do it all again.