here is my attempt at a how-to and the only reason i am doin on (other than to help out) is cause there isnt ONE how-to with all the info in one place...so here goes
Tools and Supplies:
Phillips Screwdriver
Wire Stripper
Quick Splices (Wire Connectors - Quick Splice at PartsAmerica.com)
Butt Connectors (Shop 3M: 3M Scotchlok Seamless Butt Heat Shrink Connector)
Add-a-Circuit (Parts Express:Littelfuse Add-A-Circuit Fuseholder for Mini Fuses)
Fuses
Cresent Wrench
Speaker Wire
Amp Wires and Inline fuse(Amp install kit will have it all)
RCA Cables
In-line Output Converter - IOC (Pac HL-35 Adjustable Line Output Converter Adjustable / 2-20w Input Kollman Radio Electronics- Kansas City's Car Audio, CB Radio, Scanners, Mobile Video & Alarms)
And of course the speakers and amp lol
After you make sure you got everything you need to remove the floor (both the folding and lower.
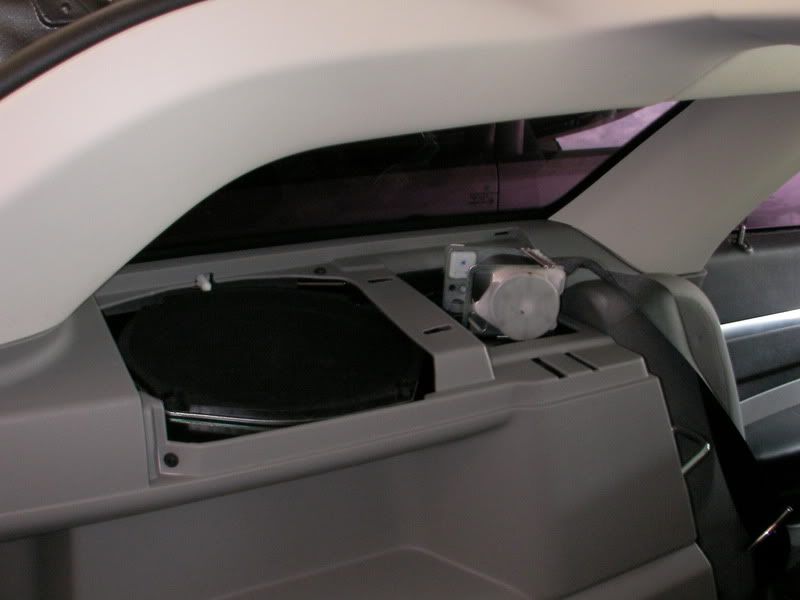
then remove the speaker cover on left side by removing one screw in the cup for the privacy cover and pop it out. i went with the left side cause it has a "mouse hole" on the bottom of the side pannel to make the wire routing easier. (will show "mouse hole" later)
![Image]()
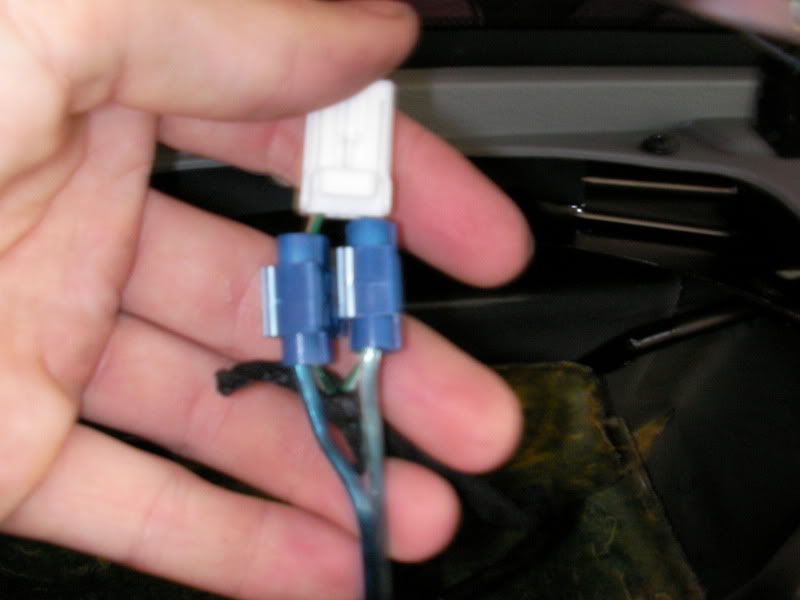
Remove the screws (4) that hold the speaker in. Then slide speaker out by lifting left side (closest to hatch) and then lift out. The side panel over laps the speaker on right side a little so you cant lift it straght out. After you get the speaker out and unplugged carefully cut the wire wrap back so you can get more slack between the wires. Now take your speaker wire that you will be installing, get the length that you will need (extra is better especially if you have an adjustable IOC) and a couple of your quick splices and connect them and the additional wire to the factory wire. On my setup the wire with the Gray is the Ground and the Brown was positive. here is a wire diagram that JamminWagon posted on here
http://www.custommagnums.com/forums/audio-video/22-speaker-wiring-diagrams-mnual.html
its kinda hard to see but when you look at the diagram, the left wire for each speaker is the power and the right is negative.
After you get the wires spliced and together is should look similiar to this
![Image]()
Now before you connect it to speaker you need to run the wire down to the "mouse hole" which is easy to do. just take the other end of the wire, reach into the speaker hole all the way down to the floor and slide it through "mouse hole." After that connect and reinstall the speaker and the cover. Also make sure you noted or remember which of the speaker wire you connect to the power and neg.
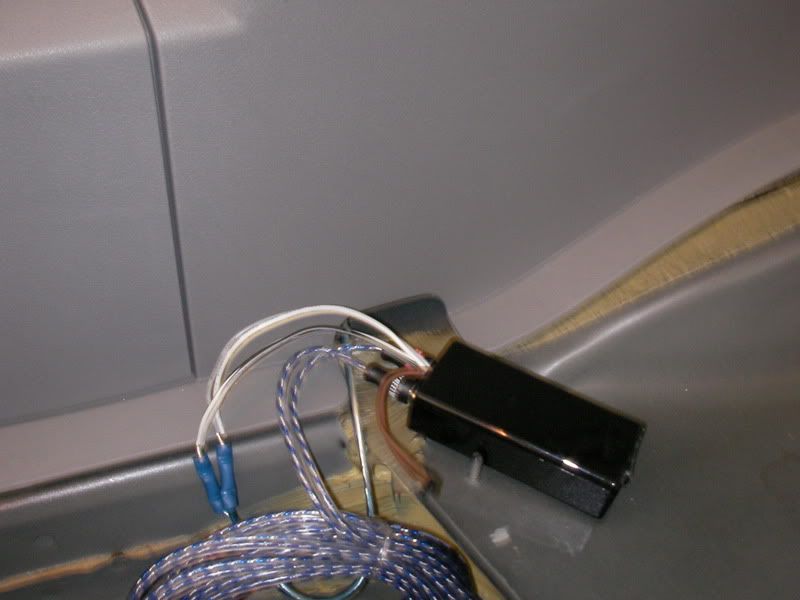
Next you need to take your IOC and connect it to the wires you ran though the "mouse hole." I got an adjustable one but you can get a set one. With that said since I only used one speaker I had to connect both power and ground to the same with coming from stock speaker.
here is the IOC connected (mainly took pic to show "mouse hole")
![Image]()
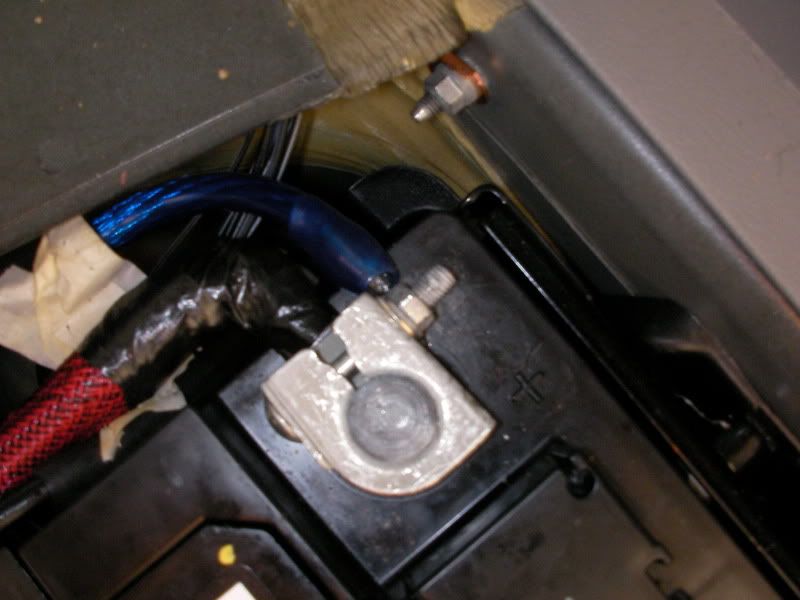
The next step is to hook up the wires for the amp (power, ground and remote) The power and ground are obvious but i took pics anyway
Power
![Image]()
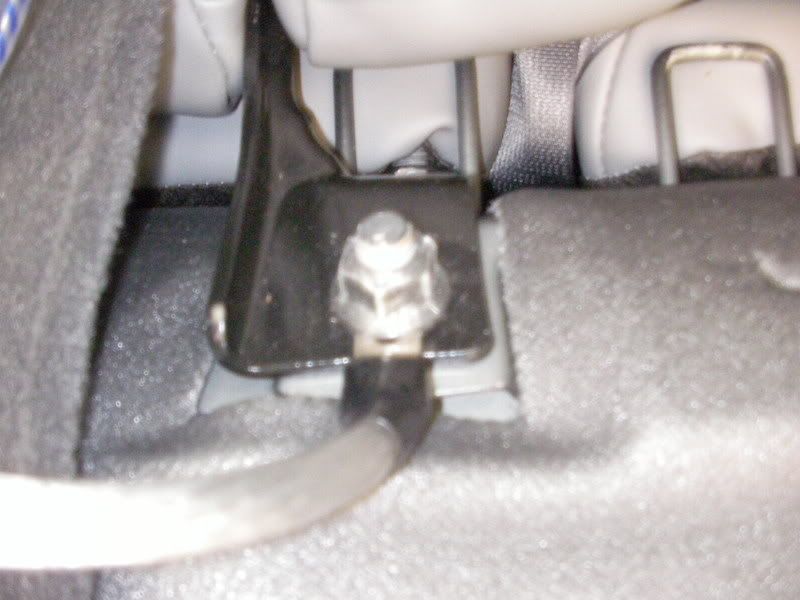
Ground - I used the center bracket of the rear seats
![Image]()
Now the part that had me confused a little and the main reason Im doin this LOL...the remote wire.
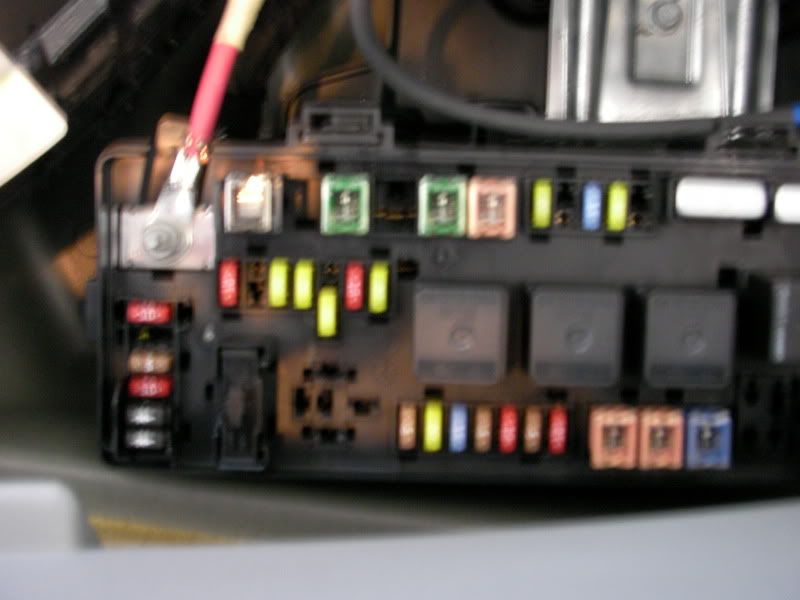
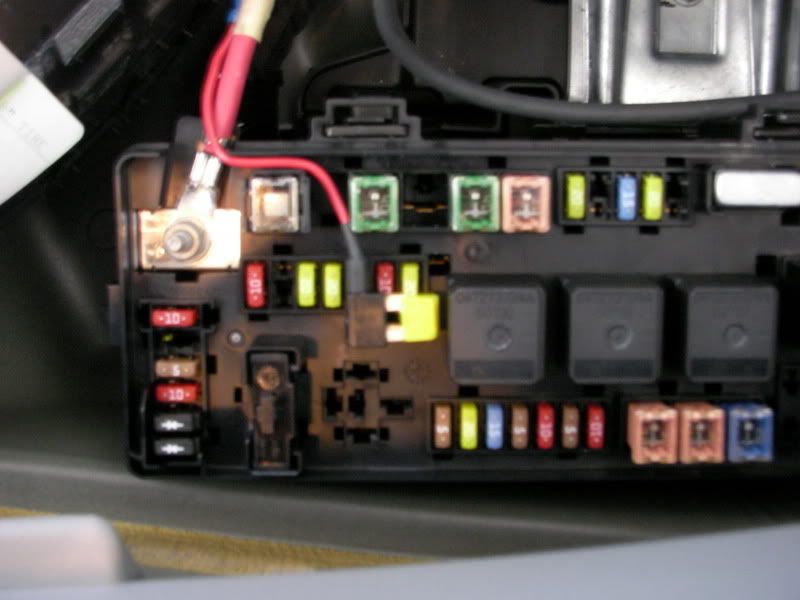
First take the cover off the fuse box and here is what you will more or less see depending on your setup
![Image]()
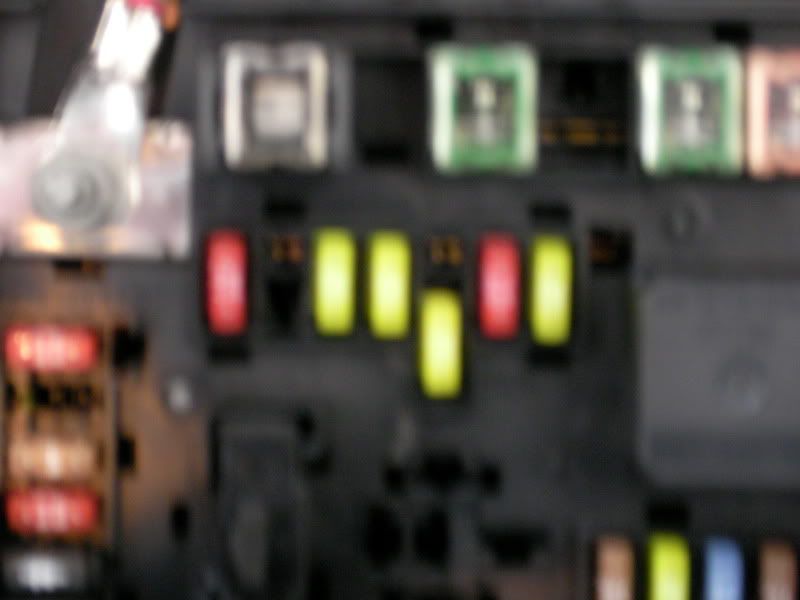
This is the area that you will be working with...the one that is staggered is the infamous fuse #18
![Image]()
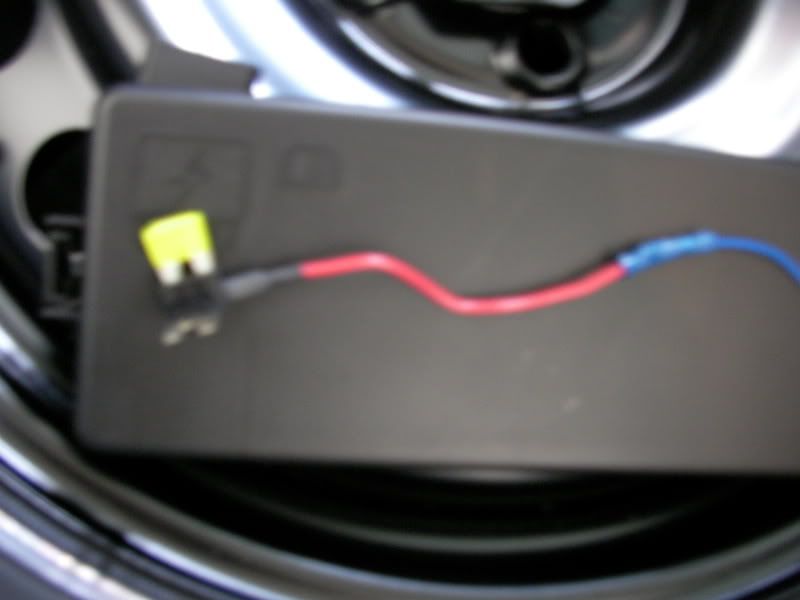
Take your add-a-fuse, use the already installed butt connector and connect to your remote wire and add the fuses (mine are 20a)
![Image]()
Now since i have the smokers package (though i dont smoke???) all I had to do is take Fuse 18 out and plug the add-a-fuse in in its place. If you dont have the smokers package fuse 18 will be inline with the rest and i believe all you have to do is plug the add-a-fuse in the staggered postion...but im not 100% on that.
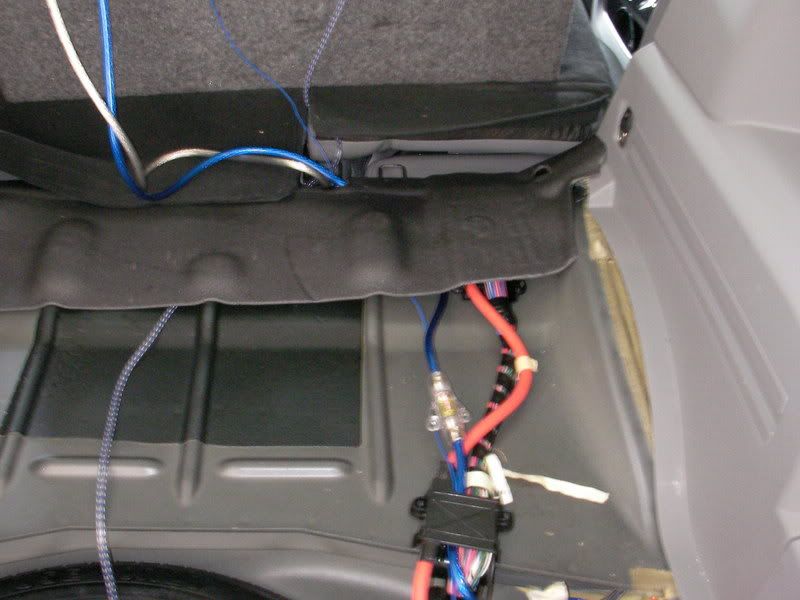
Here is how I routed the wire out of the fuse box
![Image]()
Now close up the fuse box and route the wires to your liking to get to the area right behind seat...this is mine
![Image]()
Tools and Supplies:
Phillips Screwdriver
Wire Stripper
Quick Splices (Wire Connectors - Quick Splice at PartsAmerica.com)
Butt Connectors (Shop 3M: 3M Scotchlok Seamless Butt Heat Shrink Connector)
Add-a-Circuit (Parts Express:Littelfuse Add-A-Circuit Fuseholder for Mini Fuses)
Fuses
Cresent Wrench
Speaker Wire
Amp Wires and Inline fuse(Amp install kit will have it all)
RCA Cables
In-line Output Converter - IOC (Pac HL-35 Adjustable Line Output Converter Adjustable / 2-20w Input Kollman Radio Electronics- Kansas City's Car Audio, CB Radio, Scanners, Mobile Video & Alarms)
And of course the speakers and amp lol
After you make sure you got everything you need to remove the floor (both the folding and lower.
then remove the speaker cover on left side by removing one screw in the cup for the privacy cover and pop it out. i went with the left side cause it has a "mouse hole" on the bottom of the side pannel to make the wire routing easier. (will show "mouse hole" later)
Remove the screws (4) that hold the speaker in. Then slide speaker out by lifting left side (closest to hatch) and then lift out. The side panel over laps the speaker on right side a little so you cant lift it straght out. After you get the speaker out and unplugged carefully cut the wire wrap back so you can get more slack between the wires. Now take your speaker wire that you will be installing, get the length that you will need (extra is better especially if you have an adjustable IOC) and a couple of your quick splices and connect them and the additional wire to the factory wire. On my setup the wire with the Gray is the Ground and the Brown was positive. here is a wire diagram that JamminWagon posted on here
http://www.custommagnums.com/forums/audio-video/22-speaker-wiring-diagrams-mnual.html
its kinda hard to see but when you look at the diagram, the left wire for each speaker is the power and the right is negative.
After you get the wires spliced and together is should look similiar to this
Now before you connect it to speaker you need to run the wire down to the "mouse hole" which is easy to do. just take the other end of the wire, reach into the speaker hole all the way down to the floor and slide it through "mouse hole." After that connect and reinstall the speaker and the cover. Also make sure you noted or remember which of the speaker wire you connect to the power and neg.
Next you need to take your IOC and connect it to the wires you ran though the "mouse hole." I got an adjustable one but you can get a set one. With that said since I only used one speaker I had to connect both power and ground to the same with coming from stock speaker.
here is the IOC connected (mainly took pic to show "mouse hole")
The next step is to hook up the wires for the amp (power, ground and remote) The power and ground are obvious but i took pics anyway
Power
Ground - I used the center bracket of the rear seats
Now the part that had me confused a little and the main reason Im doin this LOL...the remote wire.
First take the cover off the fuse box and here is what you will more or less see depending on your setup
This is the area that you will be working with...the one that is staggered is the infamous fuse #18
Take your add-a-fuse, use the already installed butt connector and connect to your remote wire and add the fuses (mine are 20a)
Now since i have the smokers package (though i dont smoke???) all I had to do is take Fuse 18 out and plug the add-a-fuse in in its place. If you dont have the smokers package fuse 18 will be inline with the rest and i believe all you have to do is plug the add-a-fuse in the staggered postion...but im not 100% on that.
Here is how I routed the wire out of the fuse box
Now close up the fuse box and route the wires to your liking to get to the area right behind seat...this is mine


") If you are the more adventurous type, you can by a C2A-CHY from PAC Audio and it will add the remote turn on circuit for you at the dash. You will need to run the remote wire + RCA's to the back and it costs like $80 + shipping. Sound is better than the speaker wire splice but both methods have their pros and cons.
If you are the more adventurous type, you can by a C2A-CHY from PAC Audio and it will add the remote turn on circuit for you at the dash. You will need to run the remote wire + RCA's to the back and it costs like $80 + shipping. Sound is better than the speaker wire splice but both methods have their pros and cons.