If you are looking at this thread, you are likely experiencing a knocking sound and/or a vibration that is difficult to diagnose. The LX cars have a component called a tension strut that ties the front suspension to the chasis. This tension strut has a rubber bushing on the end that ties to the chasis and is known to tear, thus losing its ability to support the front suspension. The other end of the tension strut has a ball joint that can wear out causing a knocking sound. If either end is worn, it can potentially cause a vibration that can be quite severe.
This how to will be performed on the right front suspension of a 2006 Dodge Magnum R/T. Please excuse the filth. Is February and there is more salt out there right now than asphalt.
Let's start with the obvious...
Jack the car up, support it securely with a jack stand and remove the wheel.
![Image]()
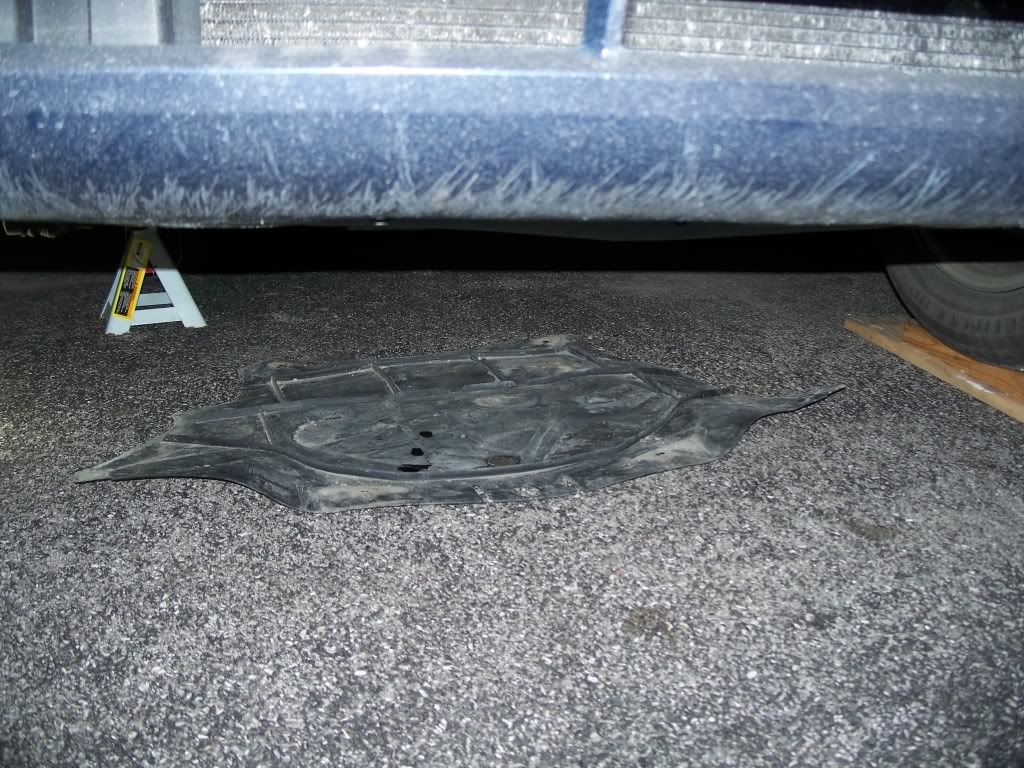
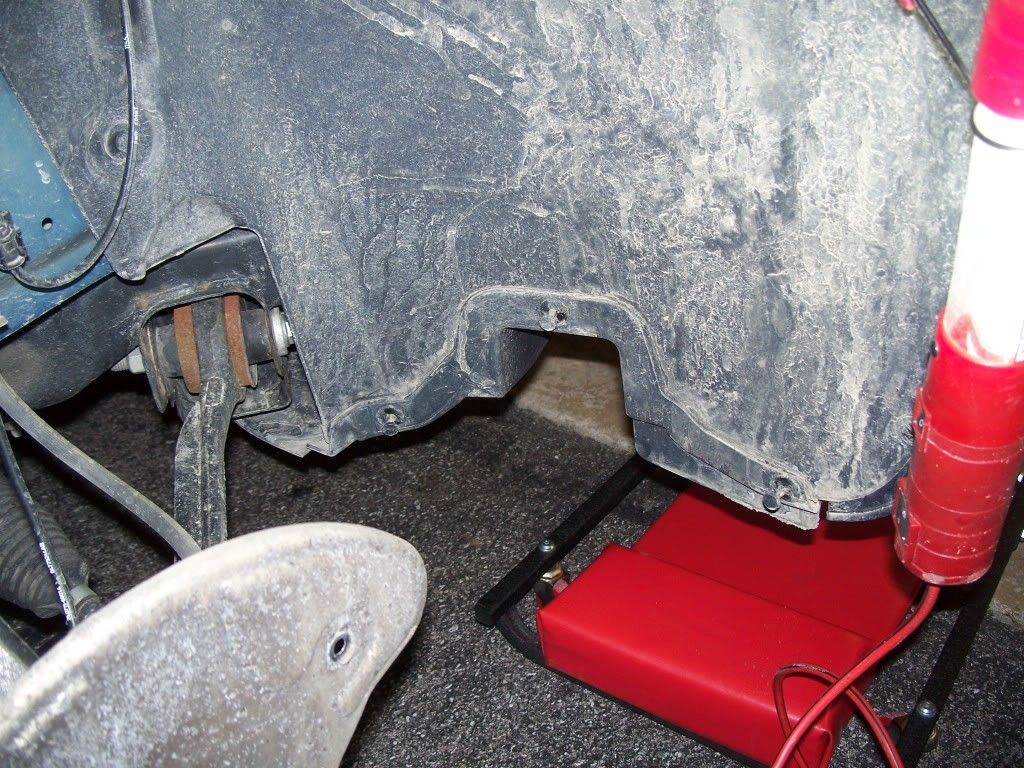
Next crawl under the front end and remove the four 10mm bolts securing the engine panel.
![Image]()
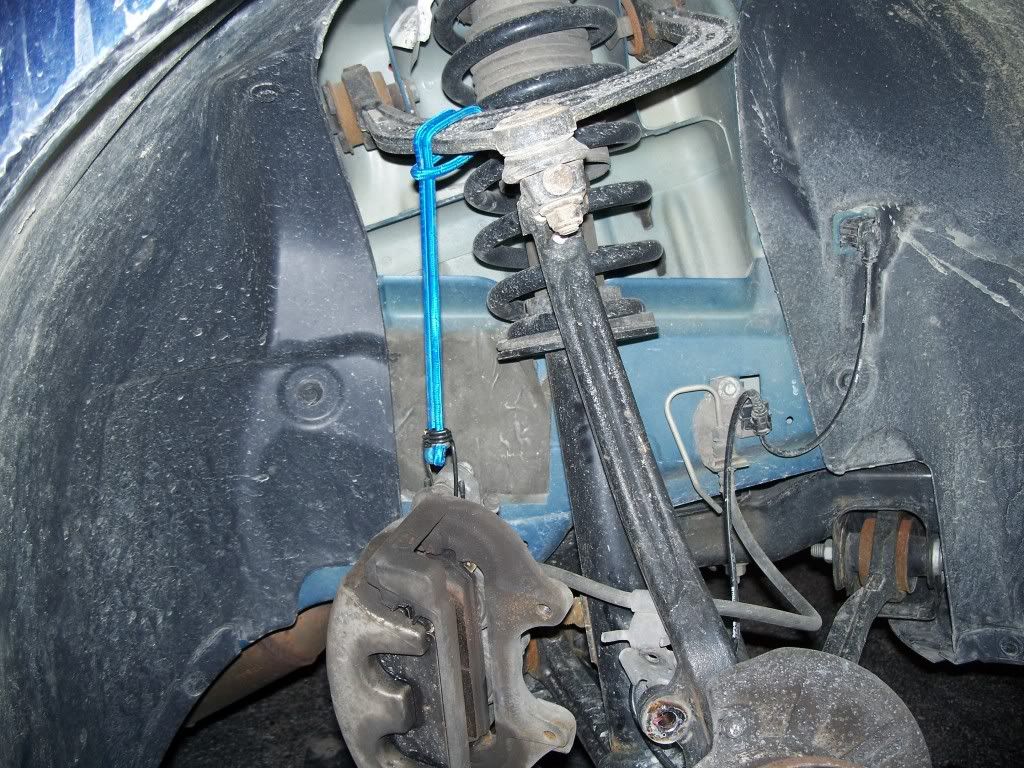
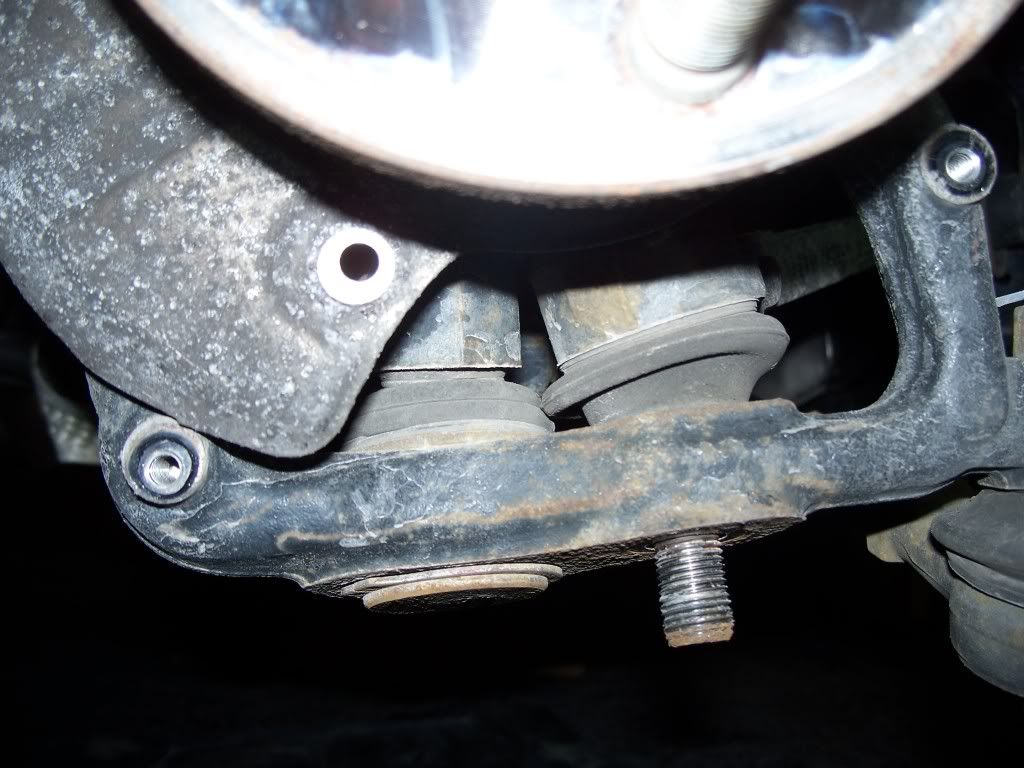
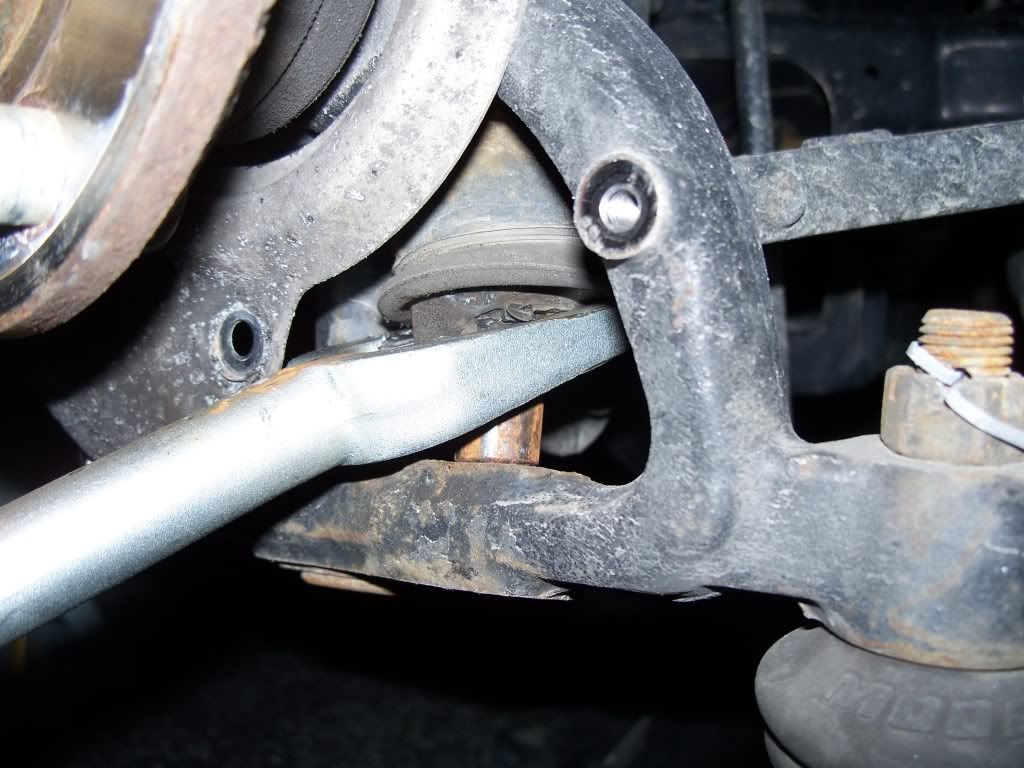
Now we can see the ends of the tension strut and inspect for damage.
Looking down on top of the brake rotor...
![Image]()
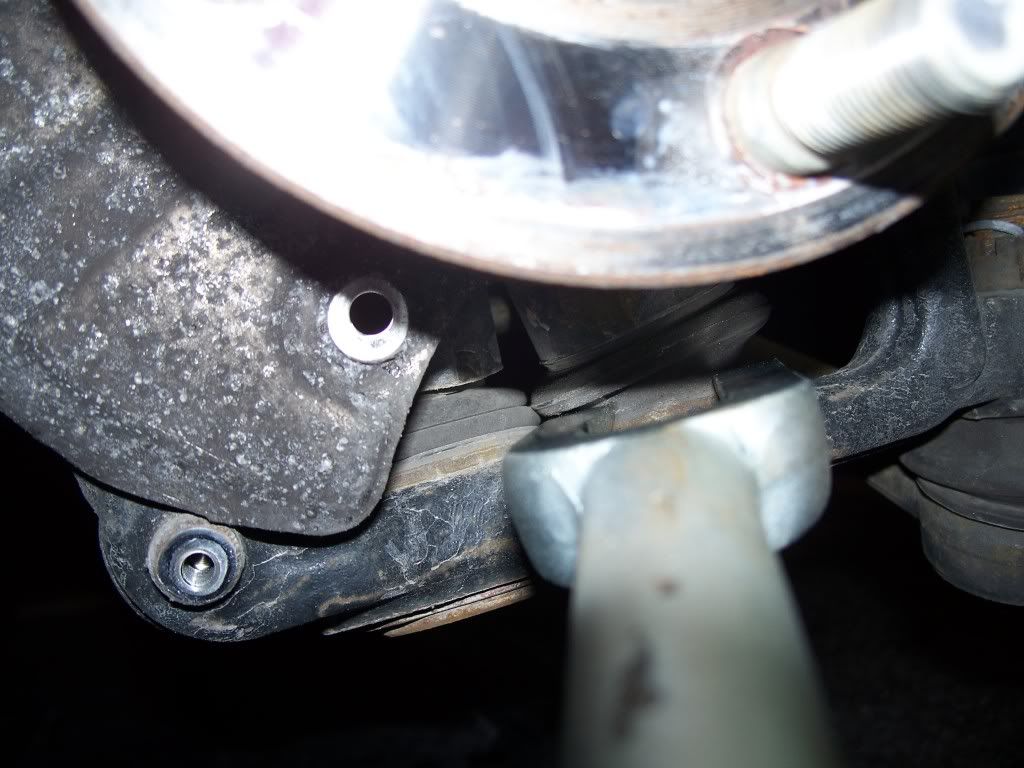
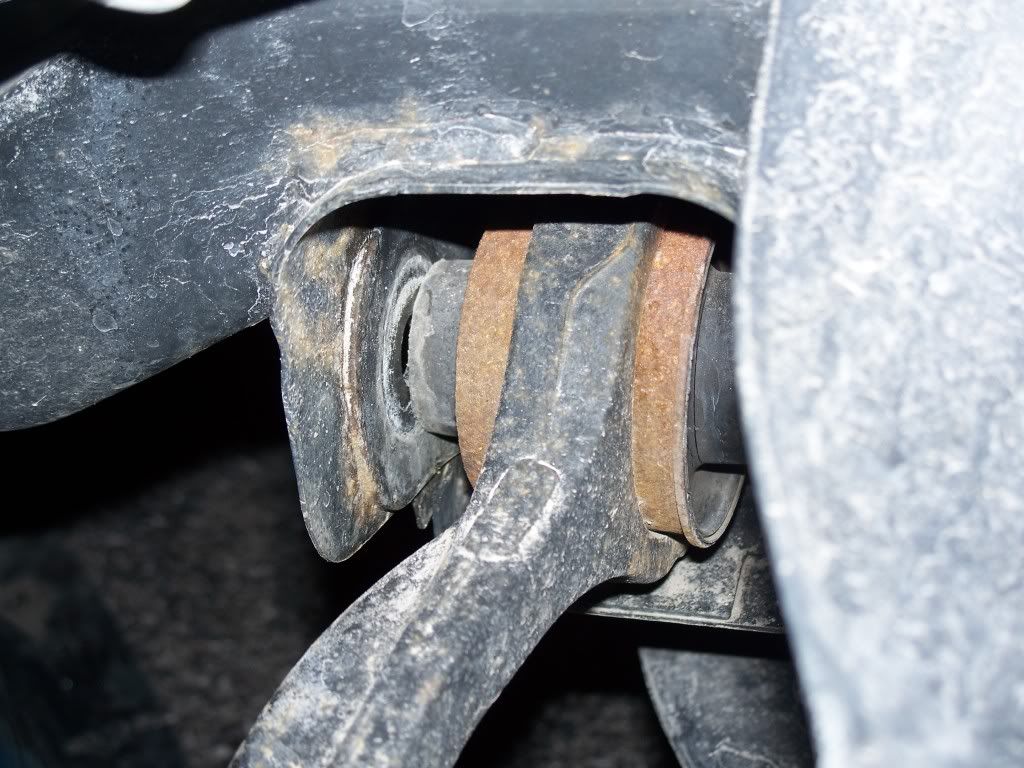
Looking straight in at the tension strut bushing... (I couldn't get a shot of just how badly torn my bushing was)
![Image]()
Now that we have identified what we are dealing with, how do you remove it and replace it with a new part?
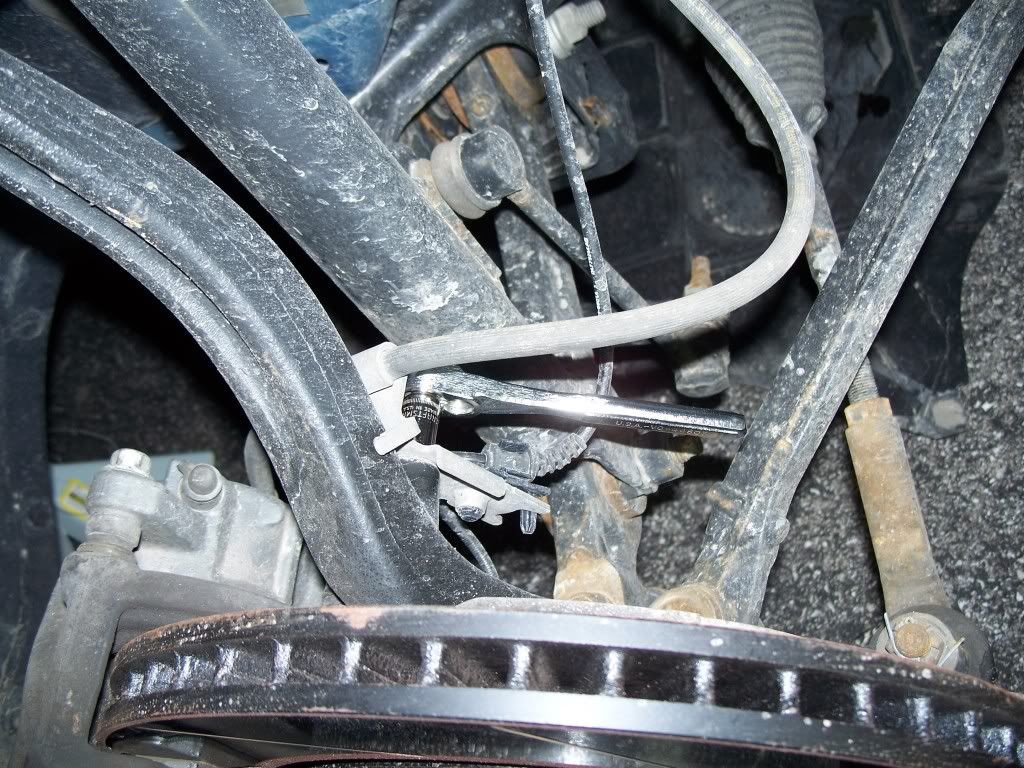
First, remove the 10mm bolt securing the brake line guide bracket (please excuse me if my terminology isn't technically correct).
![Image]()
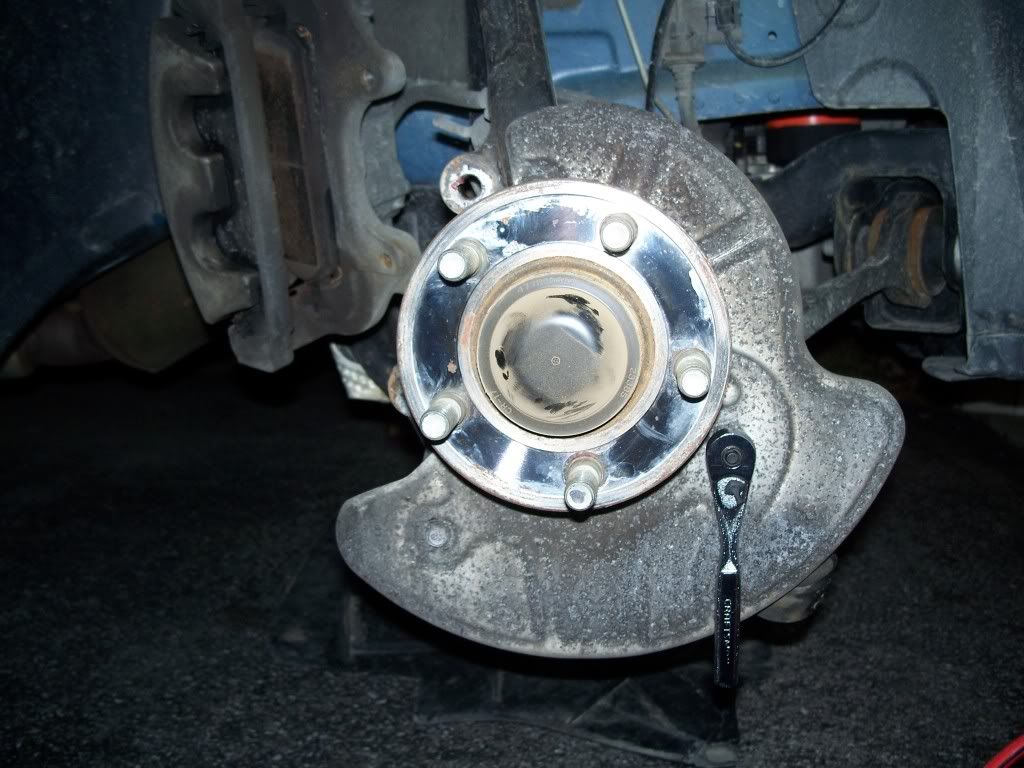
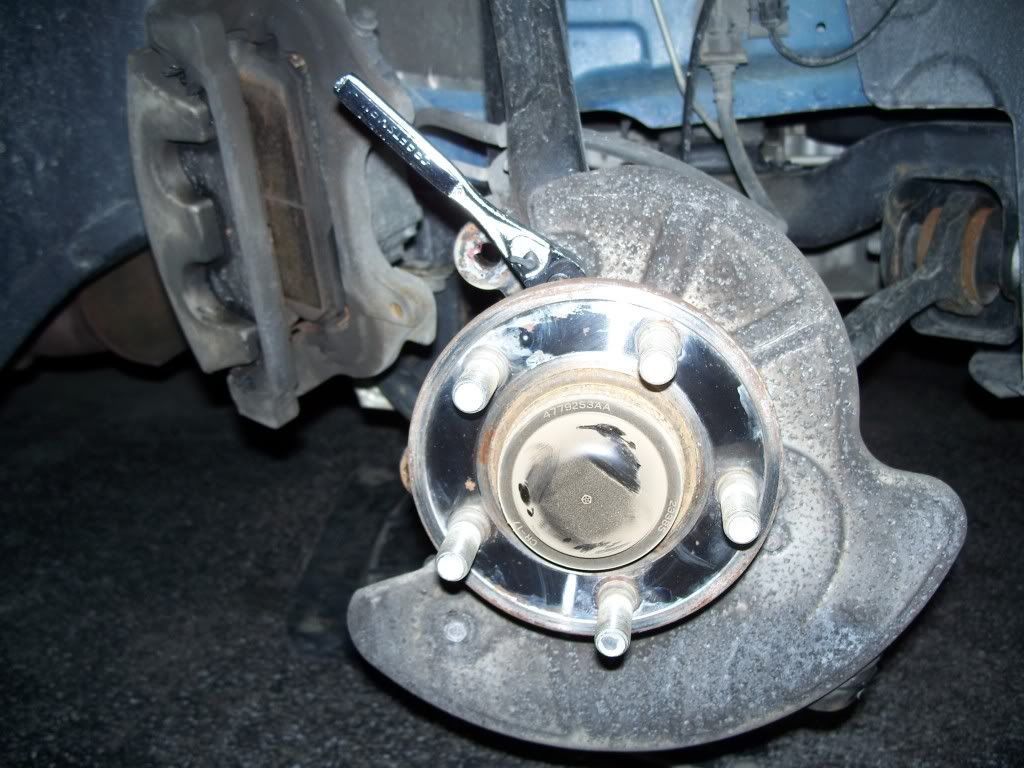
Second, remove the brake caliper. I got lazy and removed the entire assembly as a whole by removing the two 18mm bolts securing the pad frame to the knuckle.
One...
![Image]()
Two...
![Image]()
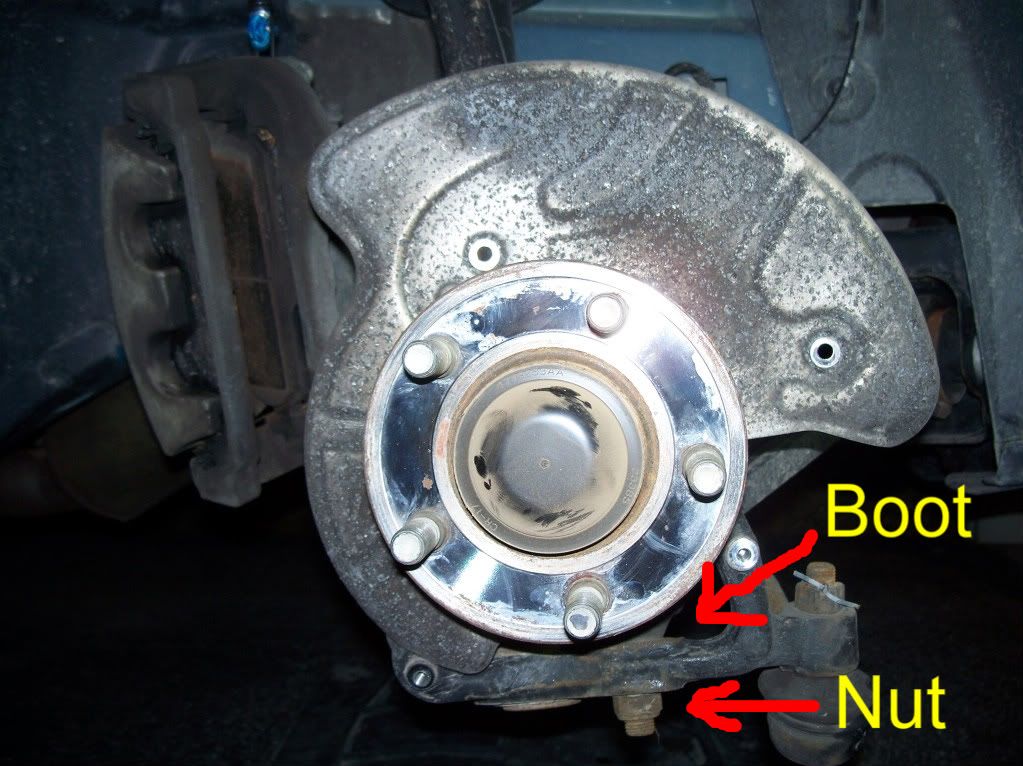
Then, slide the brake caliper assembly off and hang it out of the way with a bungy cord. However you choose to hang/support it, take care not to damage anything such as the boot on the slide pins.
![Image]()
Now remove the rotor and carefully place it somewhere safe. This will just slide off unless you still have the OEM clips holding it in place. The clips are for the assembly line only and are not necessary. With some effort they can be removed with a flat head screw driver and a pair of needle nose pliers. I don't have a picture of the clips since mine are long gone.
With the rotor out of the way we can see the three 10mm bolts holding the heat shield in place. Remove these three bolts.
One...
![Image]()
Two...
![Image]()
Three...
![Image]()
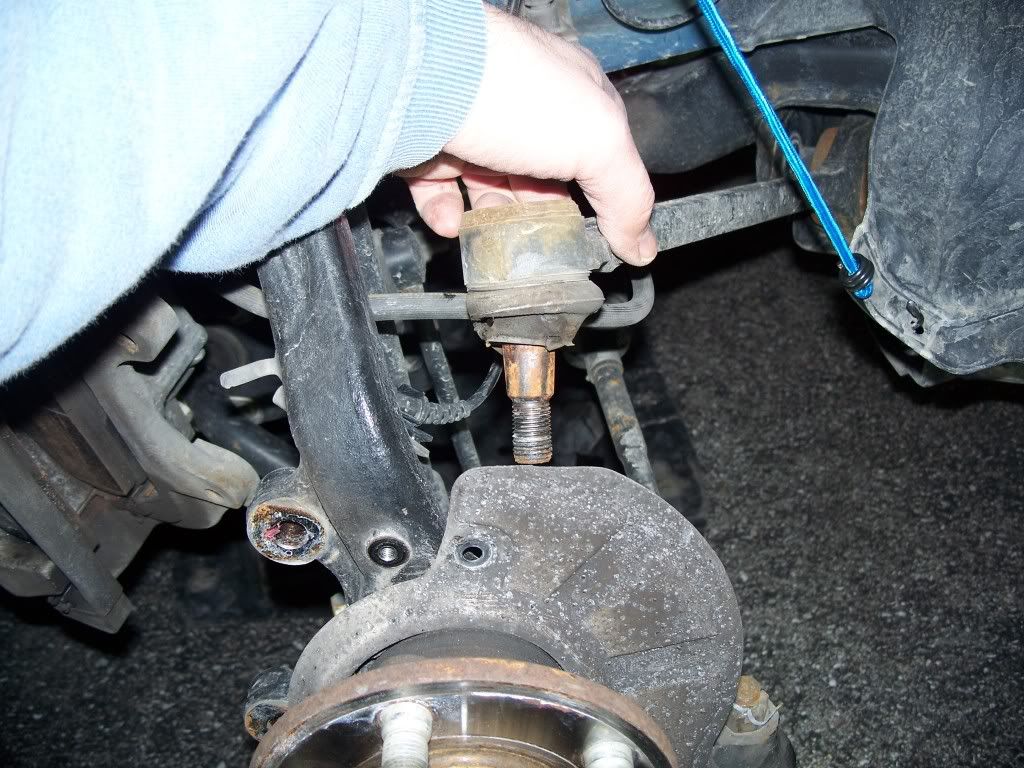
Rotate the heat shield 180°. Now we can clearly see the ball joint end of the tension strut.
![Image]()
On a closer inspection you will notice that the tension strut ball joint is very close to the lower control arm ball joint boot. As we remove the tension strut ball joint, you must take extreme care not to damage the the lower control arm ball joint boot.
![Image]()
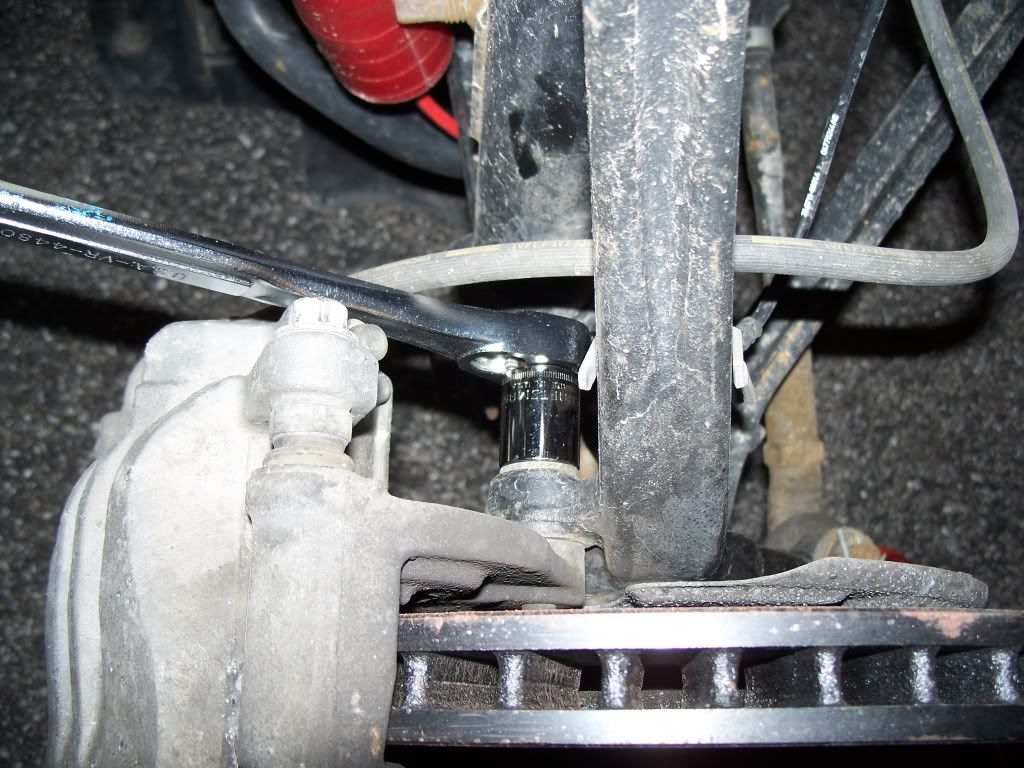
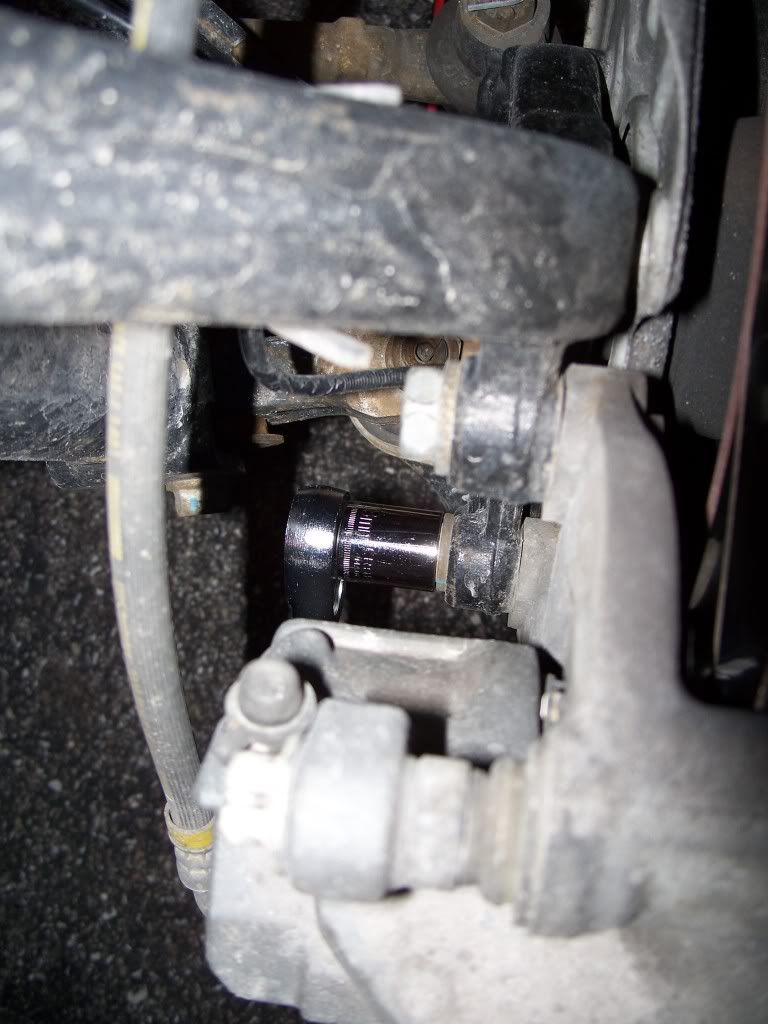
Remove the 18mm nut securing the tension strut ball joint. This may be tough to remove with a standard 3/8" ratchet, so you may need a little extra assistance. I used the removable end of my car jack.
![Image]()
![Image]()
Now we can seperate the ball joint from the knuckle. You are NOT going to accomplish this without a pickle fork. You can find these at any auto store for about $10. Auto Zone has them on their loner tool program, so you can borrow it for free (with a refundable deposit).
You can start the pickle fork in by hand taking care to clear the lower control arm boot. Your pickle fork will be pointing towards the nose of the car a bit.
![Image]()
![Image]()
I then used a 3 pound hammer to pound the pickle fork in. Stop every now and then to check that you are not damaging the lower control arm boot.
![Image]()
Keep pounding and checking. Eventually, it will pop.
![Image]()
Now that the ball joint end is free, we can loosen the bolt holding the bushing end in place. Start by removing the 3 plastic pins with flat head screw drivers.
![Image]()
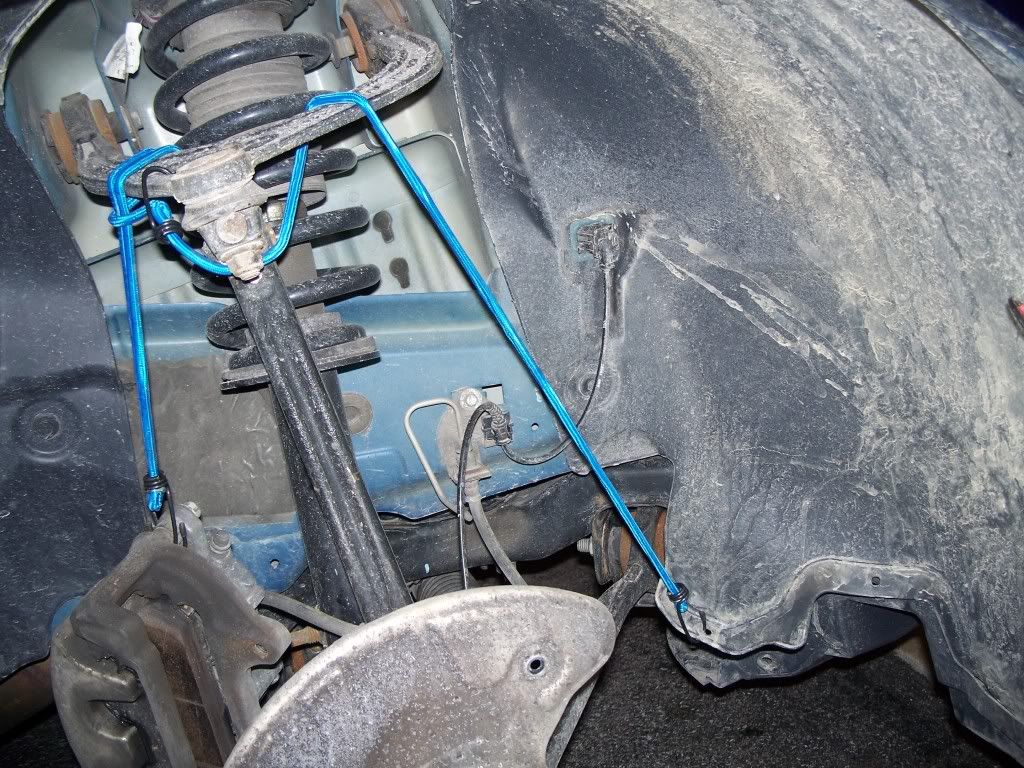
I then tied the wheel liner up and out of the way with a bungy cord like so...
![Image]()
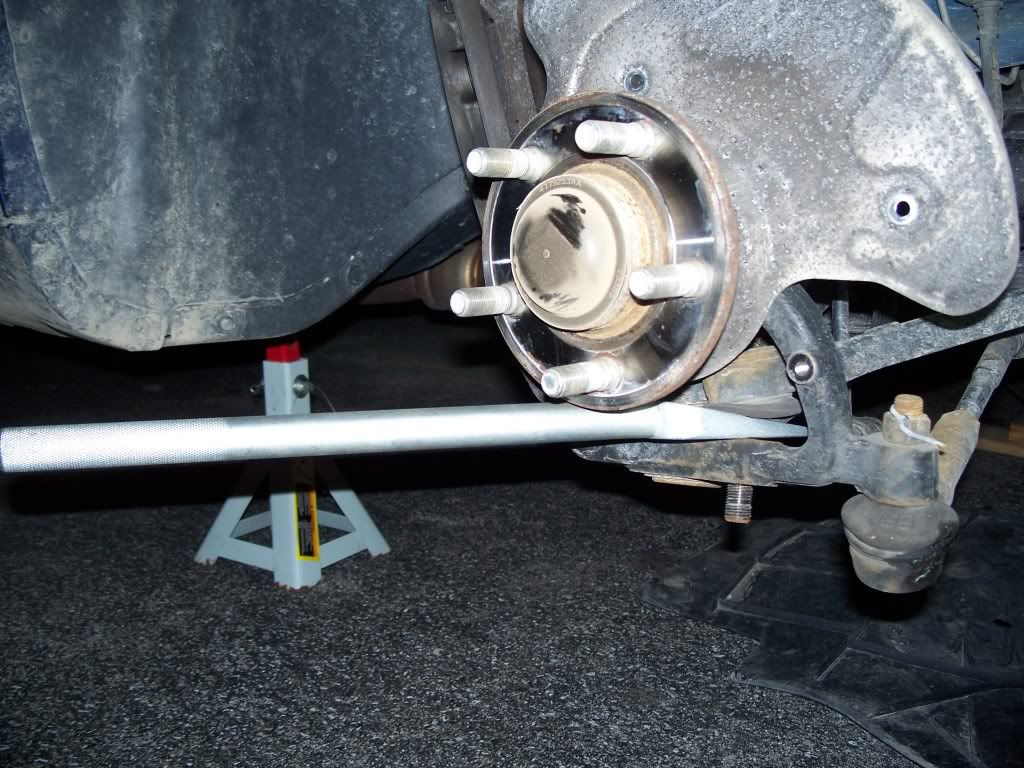
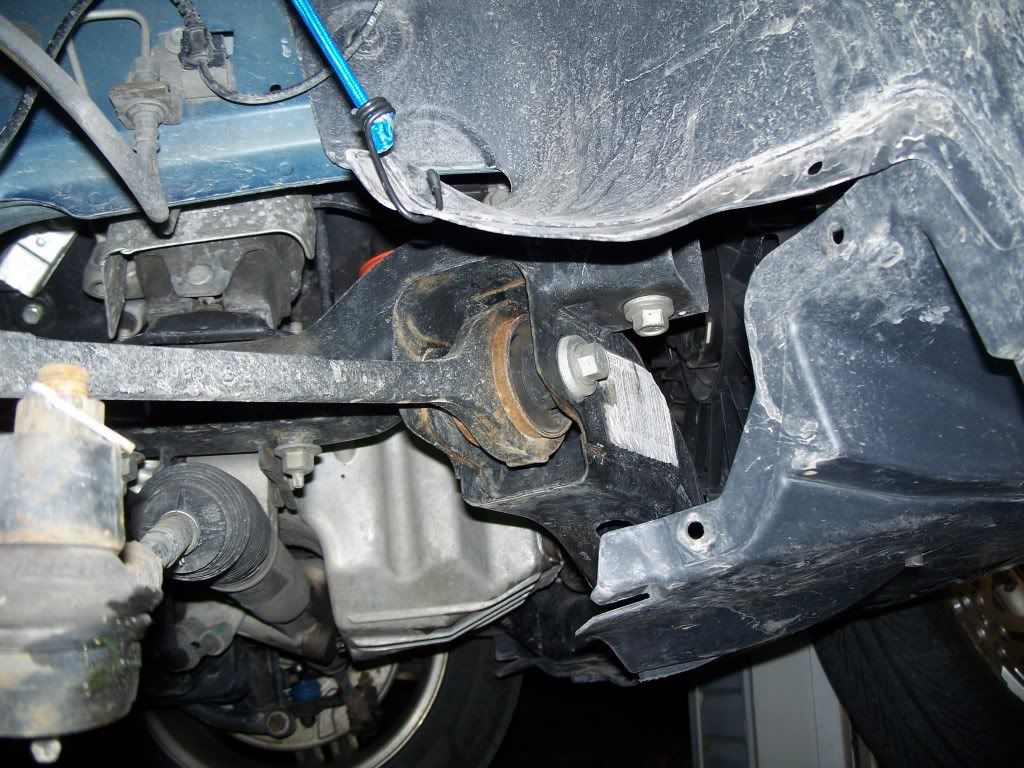
...So that I could have access to the bolt like this...
![Image]()
In the shot above, you can see the new tension strut already installed on the driver's side (blue boot).
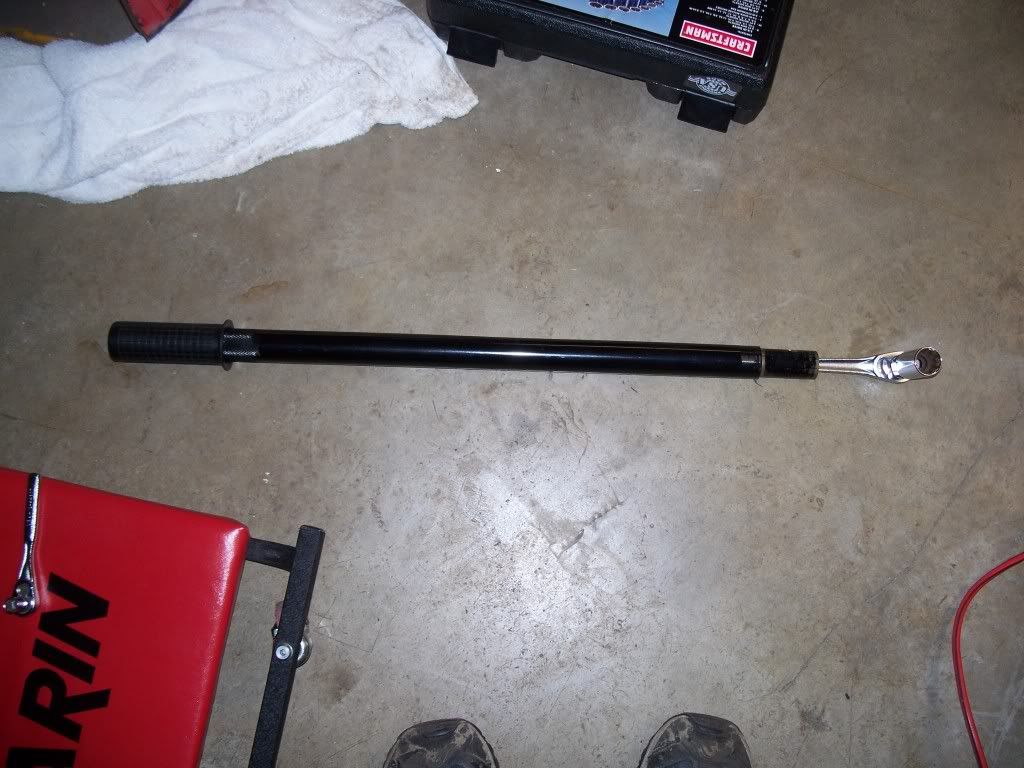
The head of the bolt is 18mm which I removed using my 3/8" drive ratchet and the cheater bar shown above. The nut on the other end is either a 20mm or 21mm nut. I had neither size but found that a 13/16" box wrench fit on the nut quite well.
![Image]()
Another angle...
![Image]()
Once the nut, bolt, and washers are removed, push the bushing end further into its mount. (Note the position of the hole for the bolt.)
![Image]()
This will give you just enough clearance to swing the ball joint end up.
![Image]()
Now you can just slide the entire part out.
We'll take a break at this point for some comparisons.
This how to will be performed on the right front suspension of a 2006 Dodge Magnum R/T. Please excuse the filth. Is February and there is more salt out there right now than asphalt.
Let's start with the obvious...
Jack the car up, support it securely with a jack stand and remove the wheel.

Next crawl under the front end and remove the four 10mm bolts securing the engine panel.
Now we can see the ends of the tension strut and inspect for damage.
Looking down on top of the brake rotor...

Looking straight in at the tension strut bushing... (I couldn't get a shot of just how badly torn my bushing was)

Now that we have identified what we are dealing with, how do you remove it and replace it with a new part?
First, remove the 10mm bolt securing the brake line guide bracket (please excuse me if my terminology isn't technically correct).
Second, remove the brake caliper. I got lazy and removed the entire assembly as a whole by removing the two 18mm bolts securing the pad frame to the knuckle.
One...
Two...
Then, slide the brake caliper assembly off and hang it out of the way with a bungy cord. However you choose to hang/support it, take care not to damage anything such as the boot on the slide pins.
Now remove the rotor and carefully place it somewhere safe. This will just slide off unless you still have the OEM clips holding it in place. The clips are for the assembly line only and are not necessary. With some effort they can be removed with a flat head screw driver and a pair of needle nose pliers. I don't have a picture of the clips since mine are long gone.
With the rotor out of the way we can see the three 10mm bolts holding the heat shield in place. Remove these three bolts.
One...
Two...
Three...

Rotate the heat shield 180°. Now we can clearly see the ball joint end of the tension strut.
On a closer inspection you will notice that the tension strut ball joint is very close to the lower control arm ball joint boot. As we remove the tension strut ball joint, you must take extreme care not to damage the the lower control arm ball joint boot.

Remove the 18mm nut securing the tension strut ball joint. This may be tough to remove with a standard 3/8" ratchet, so you may need a little extra assistance. I used the removable end of my car jack.
Now we can seperate the ball joint from the knuckle. You are NOT going to accomplish this without a pickle fork. You can find these at any auto store for about $10. Auto Zone has them on their loner tool program, so you can borrow it for free (with a refundable deposit).
You can start the pickle fork in by hand taking care to clear the lower control arm boot. Your pickle fork will be pointing towards the nose of the car a bit.

I then used a 3 pound hammer to pound the pickle fork in. Stop every now and then to check that you are not damaging the lower control arm boot.
Keep pounding and checking. Eventually, it will pop.
Now that the ball joint end is free, we can loosen the bolt holding the bushing end in place. Start by removing the 3 plastic pins with flat head screw drivers.
I then tied the wheel liner up and out of the way with a bungy cord like so...
...So that I could have access to the bolt like this...
In the shot above, you can see the new tension strut already installed on the driver's side (blue boot).
The head of the bolt is 18mm which I removed using my 3/8" drive ratchet and the cheater bar shown above. The nut on the other end is either a 20mm or 21mm nut. I had neither size but found that a 13/16" box wrench fit on the nut quite well.

Another angle...

Once the nut, bolt, and washers are removed, push the bushing end further into its mount. (Note the position of the hole for the bolt.)
This will give you just enough clearance to swing the ball joint end up.
Now you can just slide the entire part out.
We'll take a break at this point for some comparisons.