UPDATE (1/15/11): The paint flaked off of both emblems. I had to redo them. This time I really scuffed down the chrome with sandpaper and applied adhesion promoter first. It is holding up much better now. The front ram has survived the road blast so far this winter.
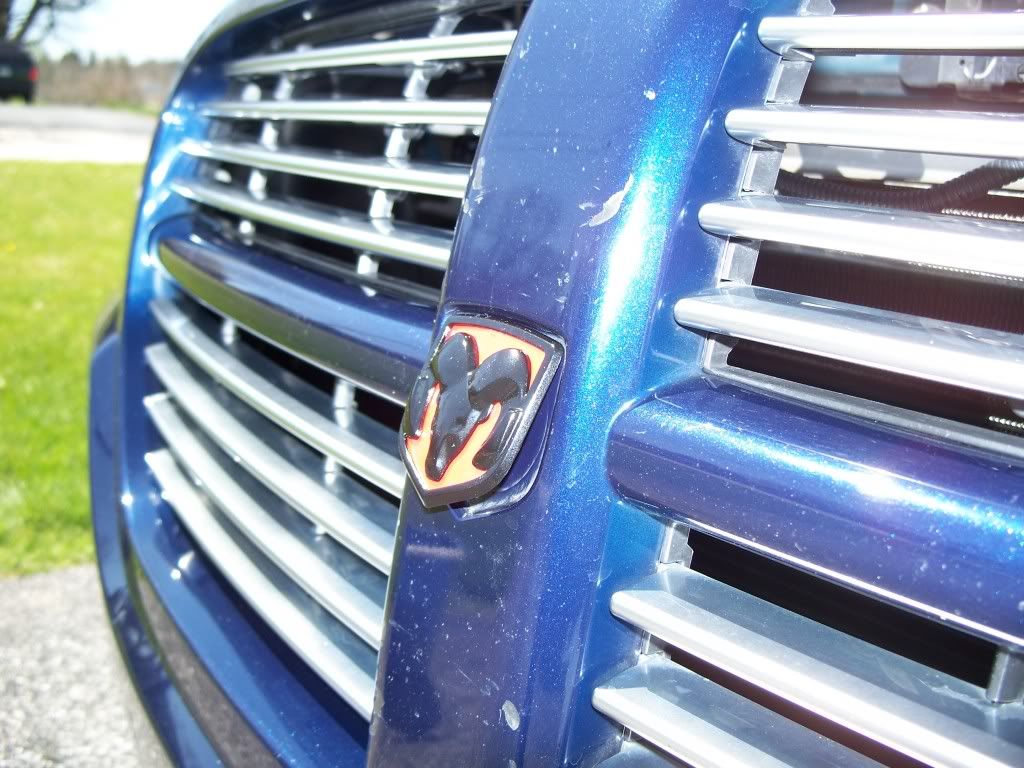
Here's a little mod that I've been working on for way too long now. I painted my front ram badge black and red to go with my overall look that I'm still working on.
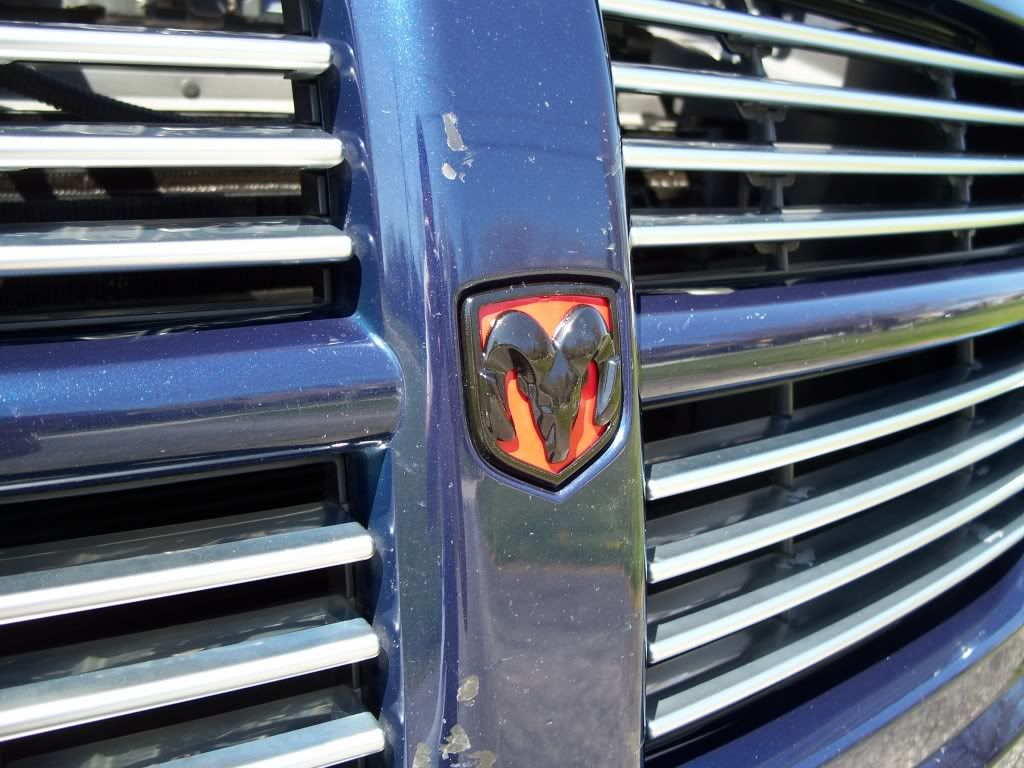
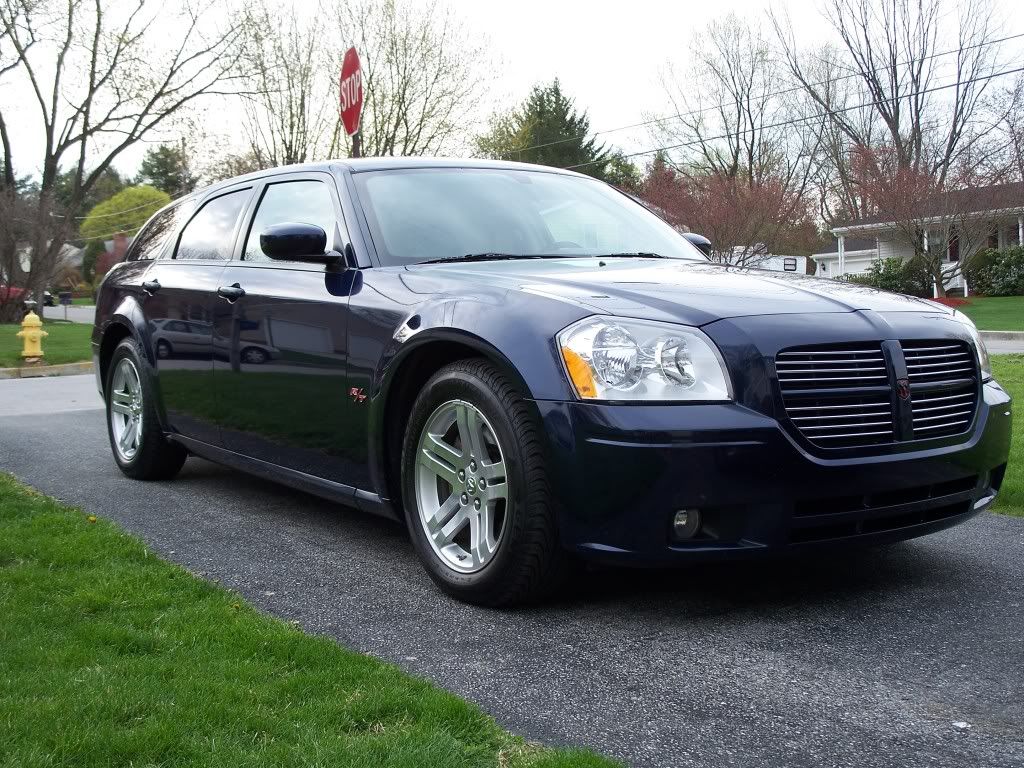
Let's start with the end result...
![Image]()
Oh, and please ignore my boogered up nose. Some one kindly "modded" my front end for me while I was eating at a restaurant around the second week that I owned the car.
Anyway, here's how you do it...
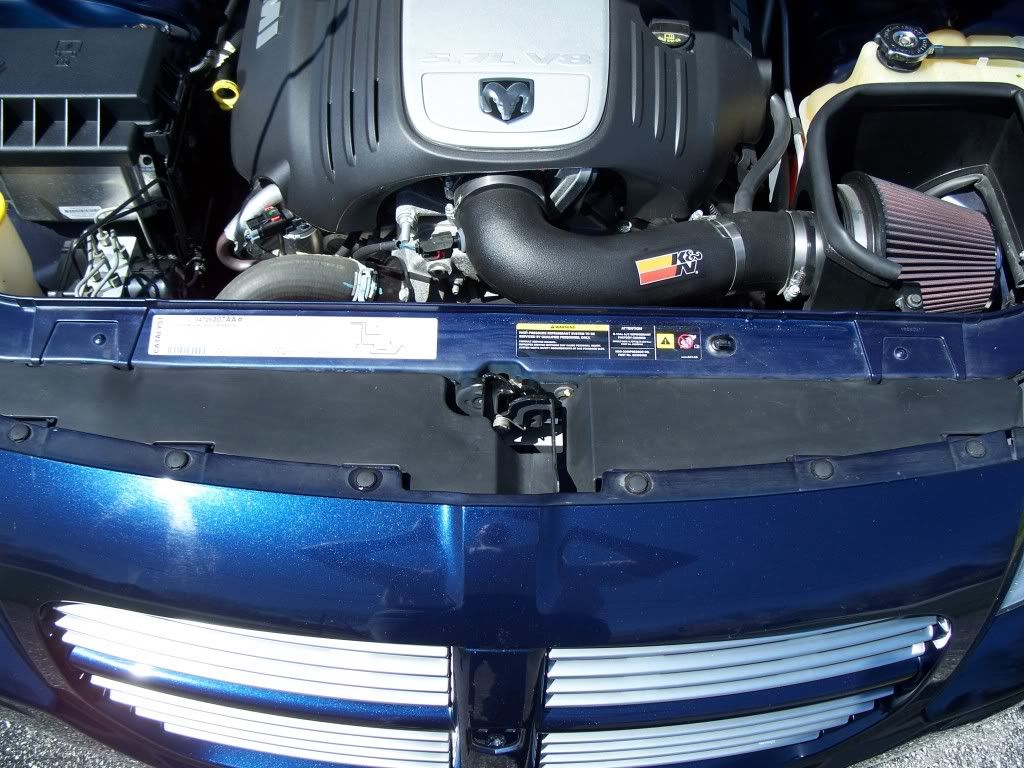
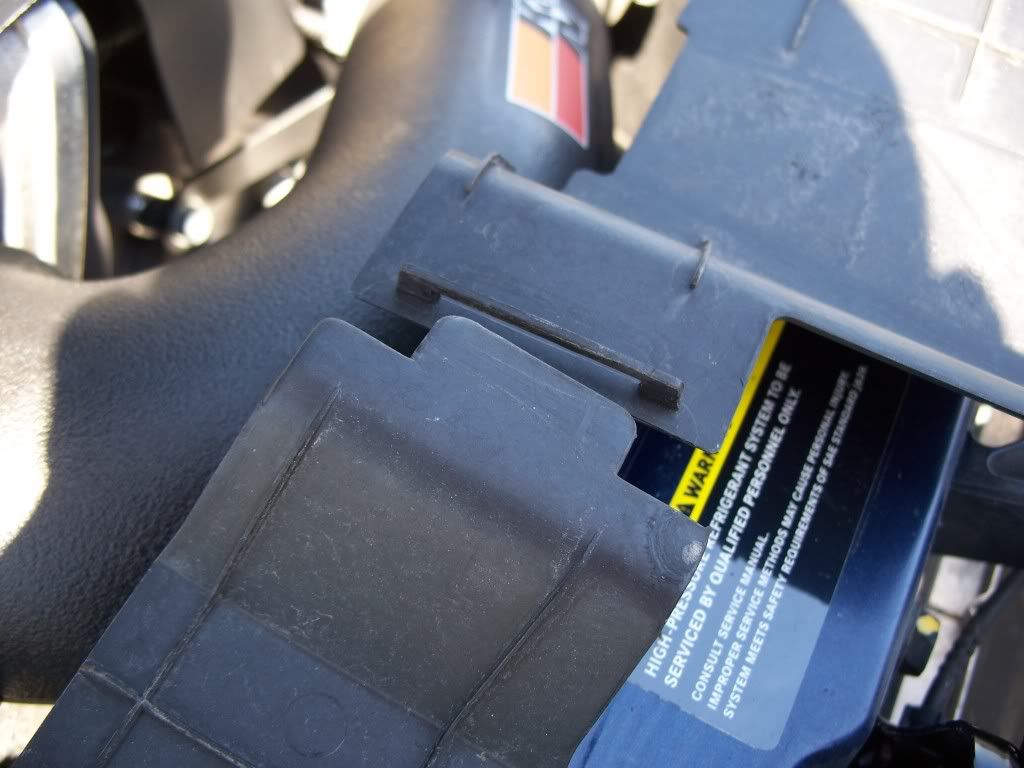
First, pop the hood and you will see two plastic panels covering the gap between the front bumper cover and the radiator support.
![Image]()
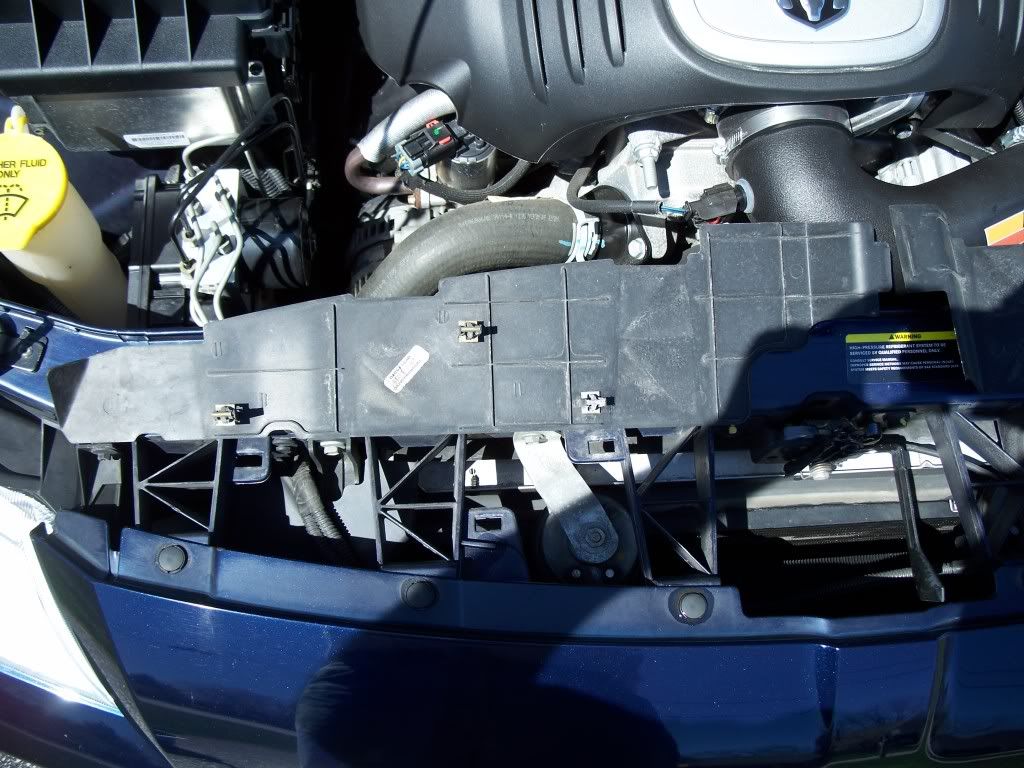
These are held in by clips so you just grab and pull straight up.
![Image]()
![Image]()
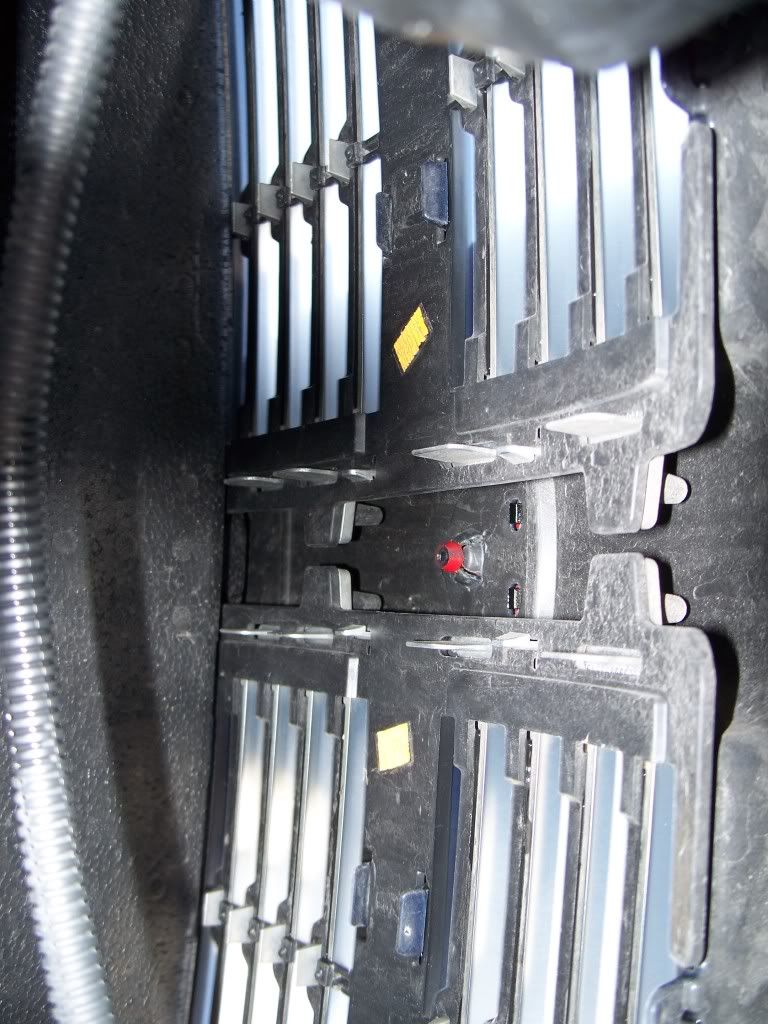
Now look at the back side of the bumper cover where the emblem is and you will see that it is held in by 4 "clips" surrounding a pin. I took this pic after the install so my pin is red.
![Image]()
Reach in there with a screw driver and pry back all four clips (easier said than done). Be careful working around the AC condensor! It will bust up your knucles quick. I learned the hard way. When all of the clips are pulled back, you can push the pin through (you may have to wiggle it out). You will end up with this...
![Image]()
Just rotate it out the rest of the way.
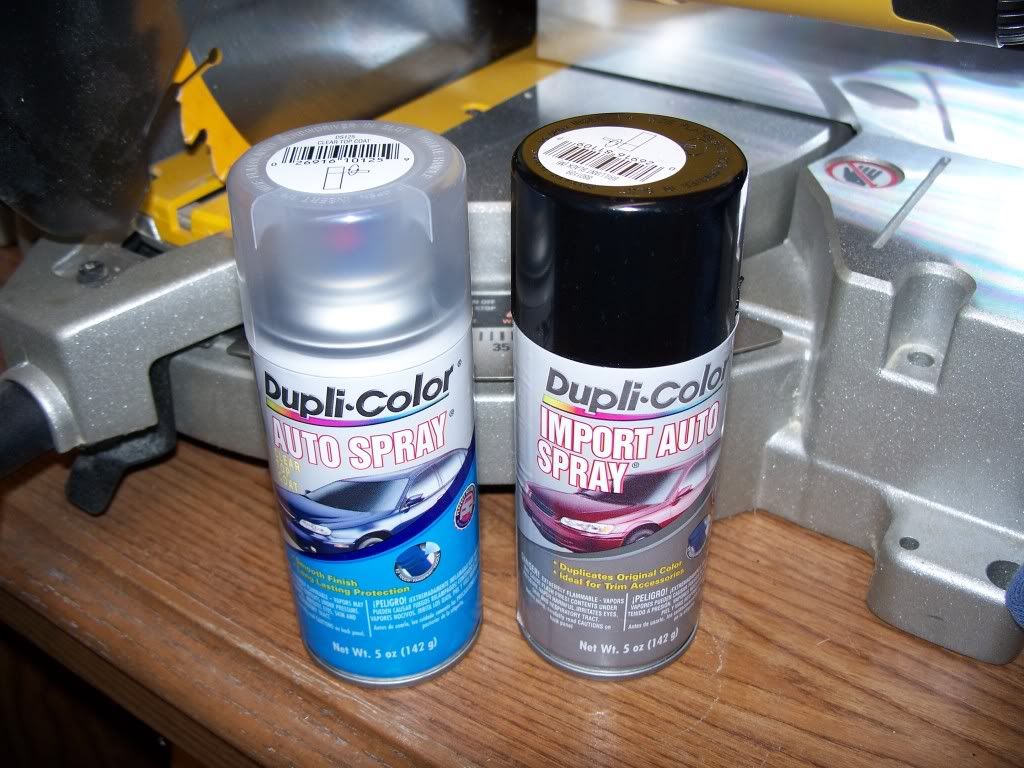
Now if you're interested in painting the badge, this is what I used...
![Image]()
The painting part is pretty straight forward. I did scuff up the crome parts first, though.
Here's how I broke down the emblem to paint it...
First, you have to get the back (part with the pin) to flex. I accomplished this by carefully wedging screw drivers between the two pieces like this...
![Image]()
I inserted the screw drivers where the ram's horns touched the outter edges of the emblem frame so that any scratches made by the screw drivers would be hidden. Next, take another screw driver and put it in the little indent for the clip at the top. Turn the screw driver carefully to flex the top part of the frame until it pops off of the backing.
![Image]()
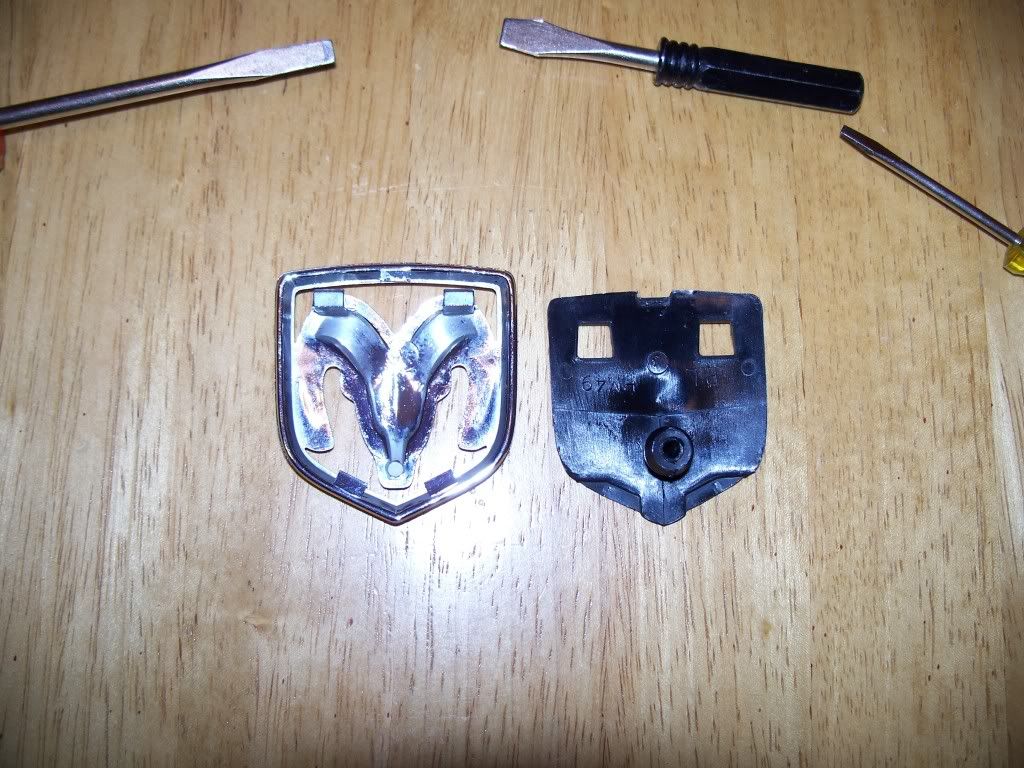
Now you can slide the backing off and paint them to your liking.
![Image]()
![Image]()
![Image]()
So, why did I paint the badges? To match these...
![Image]()
Reinstalling the badge is a breeze. Just line it up and push it in. I highly recommend, though, that you squeeze the clips around the pin to make sure that they are full engaged behind the pin head. Mine needed that extra effort.
When you put the cover back on, make sure you line up the pieces so that they overlap. Like this...
![Image]()
This will have to be done AFTER one is already installed.
Enjoy!
![Image]()
I am also working on doing the same thing on the rear, but I ran into an issue reinstalling it. So, now I have to back track a bit. I will expain when I get that one done.
Here's a little mod that I've been working on for way too long now. I painted my front ram badge black and red to go with my overall look that I'm still working on.
Let's start with the end result...
Oh, and please ignore my boogered up nose. Some one kindly "modded" my front end for me while I was eating at a restaurant around the second week that I owned the car.
Anyway, here's how you do it...
First, pop the hood and you will see two plastic panels covering the gap between the front bumper cover and the radiator support.
These are held in by clips so you just grab and pull straight up.

Now look at the back side of the bumper cover where the emblem is and you will see that it is held in by 4 "clips" surrounding a pin. I took this pic after the install so my pin is red.
Reach in there with a screw driver and pry back all four clips (easier said than done). Be careful working around the AC condensor! It will bust up your knucles quick. I learned the hard way. When all of the clips are pulled back, you can push the pin through (you may have to wiggle it out). You will end up with this...
Just rotate it out the rest of the way.
Now if you're interested in painting the badge, this is what I used...
The painting part is pretty straight forward. I did scuff up the crome parts first, though.
Here's how I broke down the emblem to paint it...
First, you have to get the back (part with the pin) to flex. I accomplished this by carefully wedging screw drivers between the two pieces like this...

I inserted the screw drivers where the ram's horns touched the outter edges of the emblem frame so that any scratches made by the screw drivers would be hidden. Next, take another screw driver and put it in the little indent for the clip at the top. Turn the screw driver carefully to flex the top part of the frame until it pops off of the backing.

Now you can slide the backing off and paint them to your liking.


So, why did I paint the badges? To match these...

Reinstalling the badge is a breeze. Just line it up and push it in. I highly recommend, though, that you squeeze the clips around the pin to make sure that they are full engaged behind the pin head. Mine needed that extra effort.
When you put the cover back on, make sure you line up the pieces so that they overlap. Like this...
This will have to be done AFTER one is already installed.
Enjoy!
I am also working on doing the same thing on the rear, but I ran into an issue reinstalling it. So, now I have to back track a bit. I will expain when I get that one done.